Goldfish: Wireless Rocket Igniter
As a project sponsored by CU’s rocketry club, COBRA (now CUSRL), I designed and built a wireless ignition system for high power rockets. When launching to over ten thousand feet, rockets get large enough that we need thousands of feet of standoff distance for safety. Rather than carry a large spool of wire, we decided to look into wireless ignition systems.
Due to the nature of rocketry I feel the need to be explicit about liability. This is not a finished product and I don’t guarantee reliability or safety if you copy it. You take full responsibility for everything you make. Please don’t blow yourself up.
You Know What Would Be Cool…
The concept of a wireless igniter for model rockets was born in my college dorm room.
It all boiled down to a few basic objectives:
- Never launch unless commanded
- Always launch when commanded or inform the user of errors
- Simple enough for safe operation by inexperienced users
- Legal to operate with a technician class amateur radio license
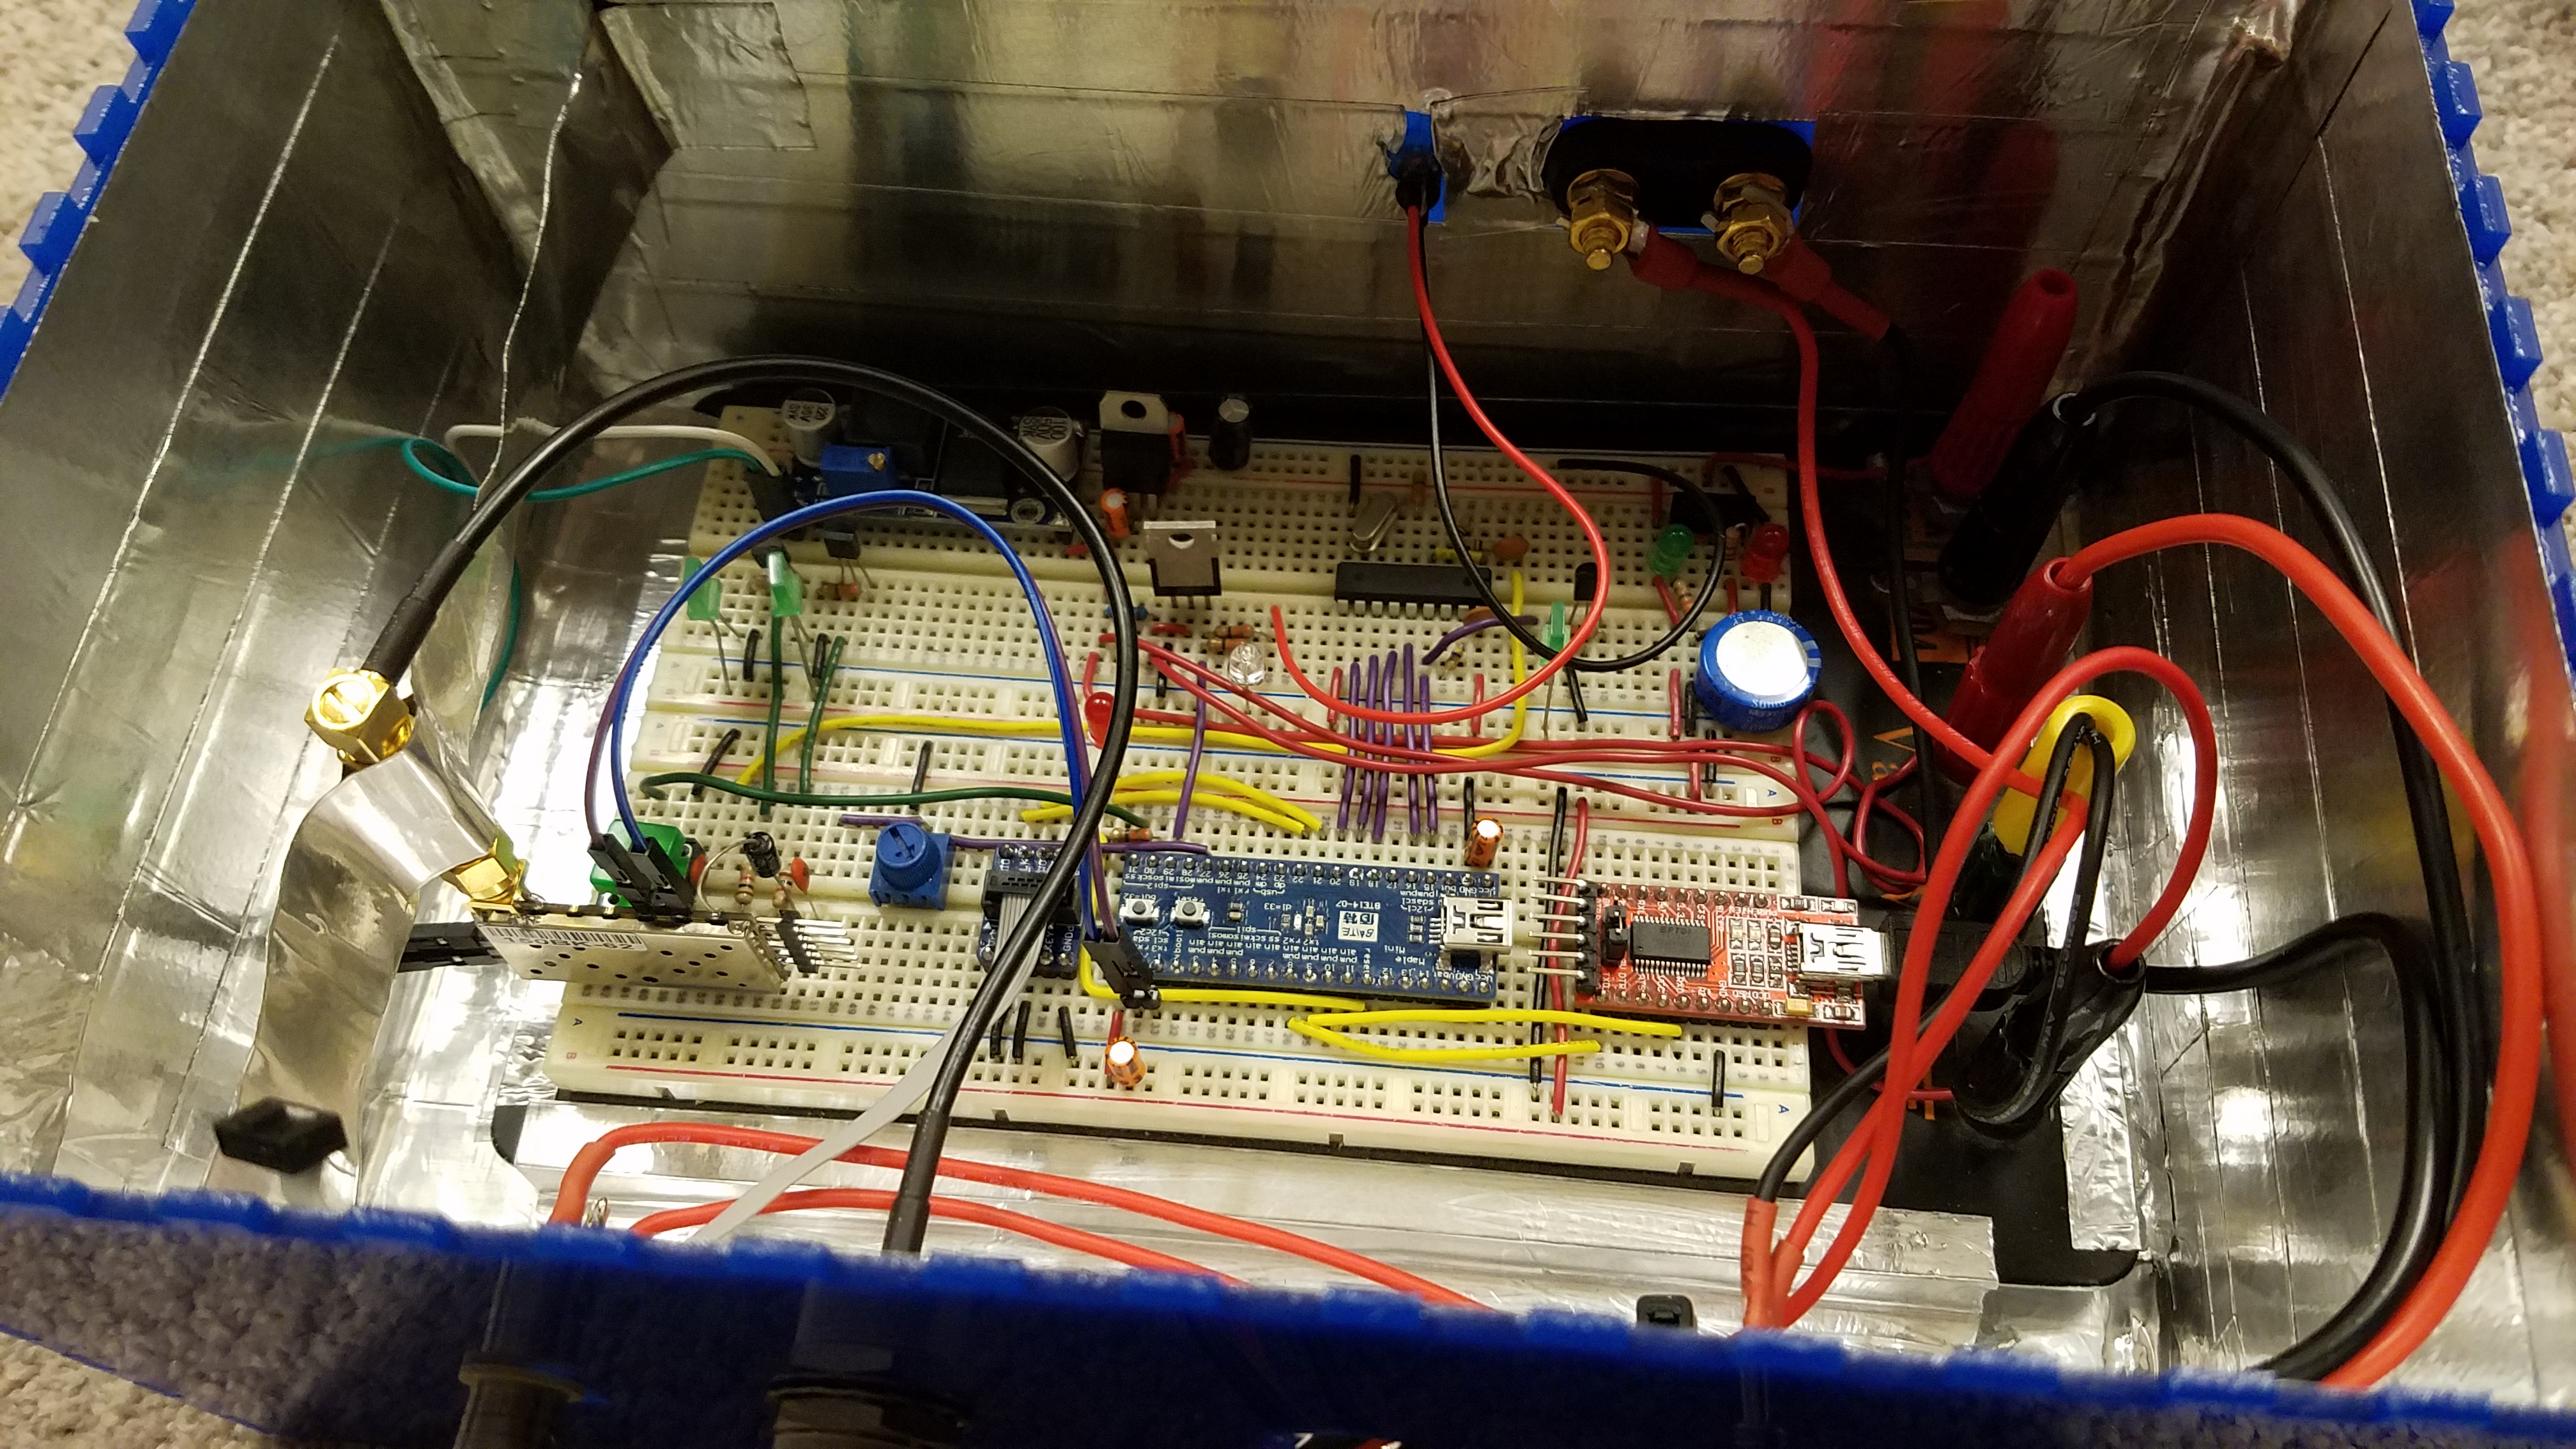
Wanting to have something to show off as soon as possible, I built quick and dirty proof of concept with a breadboard and parts I had on hand.
That consisted of a STM32 development board, an off the shelf UHF FM radio module, and a DTMF decoder IC with the antenna from a handheld radio and an external car battery.
If you don’t know about DTMF, they’re the tones you hear when you press numbers on a telephone. Each number consists of two tones, one indicating the column and one the row on the number pad.
 Yes, that is aluminum tape holding the radio module in place so it wouldn’t fall out of the breadboard. No I didn’t have anything better at the time.
It wasn’t hard to get this working very rudimentarily, though there were some serious flaws.
For one thing, I intentionally ignored power on/off tranients because I just wanted a proof of concept for myself. Especially combined with the external battery and janky aligator clips, I had concerns about any sort of power event with an igniter connected causing accidental launches. I could keep myself safe by only connecting the igniter once power was applied and configuration loaded but it certainly wasn’t stupid-proof.
The other primary flaw was the user interface. To launch the rocket, all you had to do was type a launch code into a handheld radio while transmitting. A series of tones would be sent back from the igniter to indicate the message was received and report any errors. This is all fine but the bad part was configuration. I made the launch code, frequency, and callsign configurable at power-on using a laptop over USB. In retrospect it might have been better to hard-code these values and avoid the need to have a laptop in the middle of a muddy field when you’re just trying to light some propellent on fire.
Also, I didn’t have any large power resistors and didn’t want to make anything more complex so this design had absolutely no current limiting on the output. I only blew one or two FETs by driving into a hard short. Thankfully the resistance of an e-match is high enough that it could survive normal use.
The Box That Smiles Back
No, I’m not sponsored by Pepperidge Farm.
I needed an enclosure for this pile of wires but where could I possibly find something at 10:00 PM in a college dorm?
The only rational answer was my to take the empty Goldfish box from my roommate’s desk.
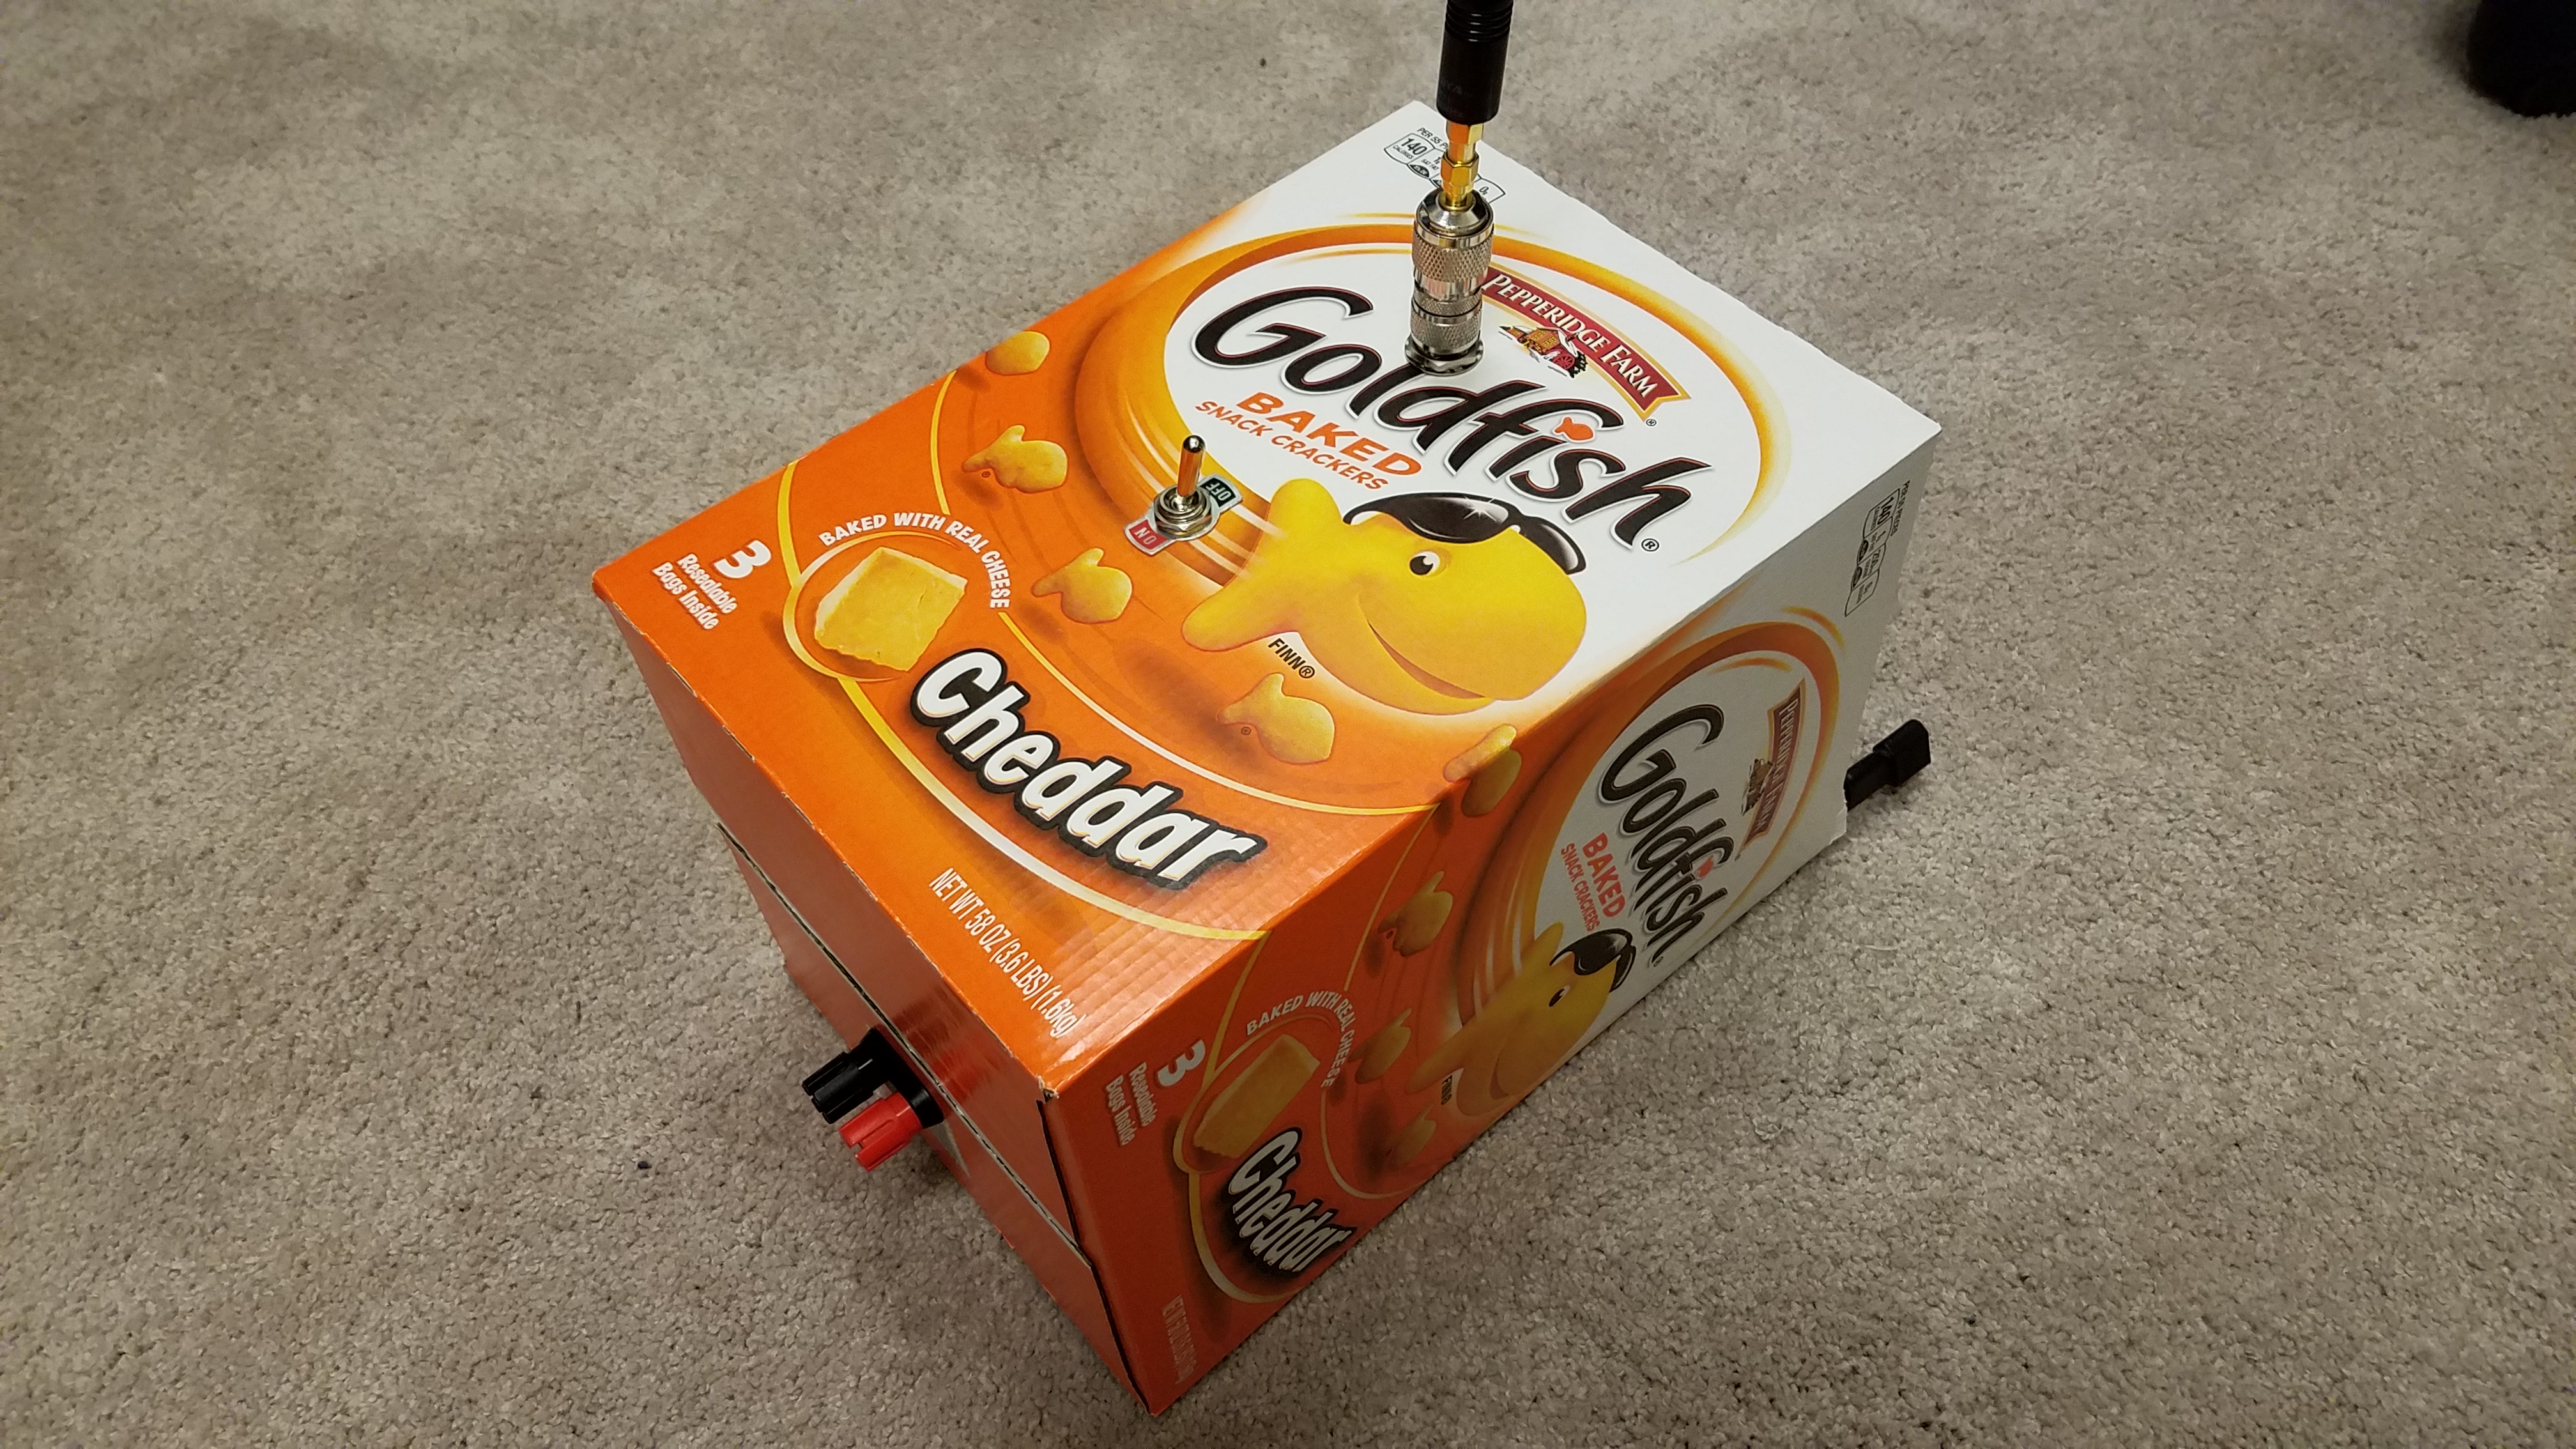 Five minutes and a pair of scissors certainly turned a piece of trash into the flimiest enclosure I’ve ever made.
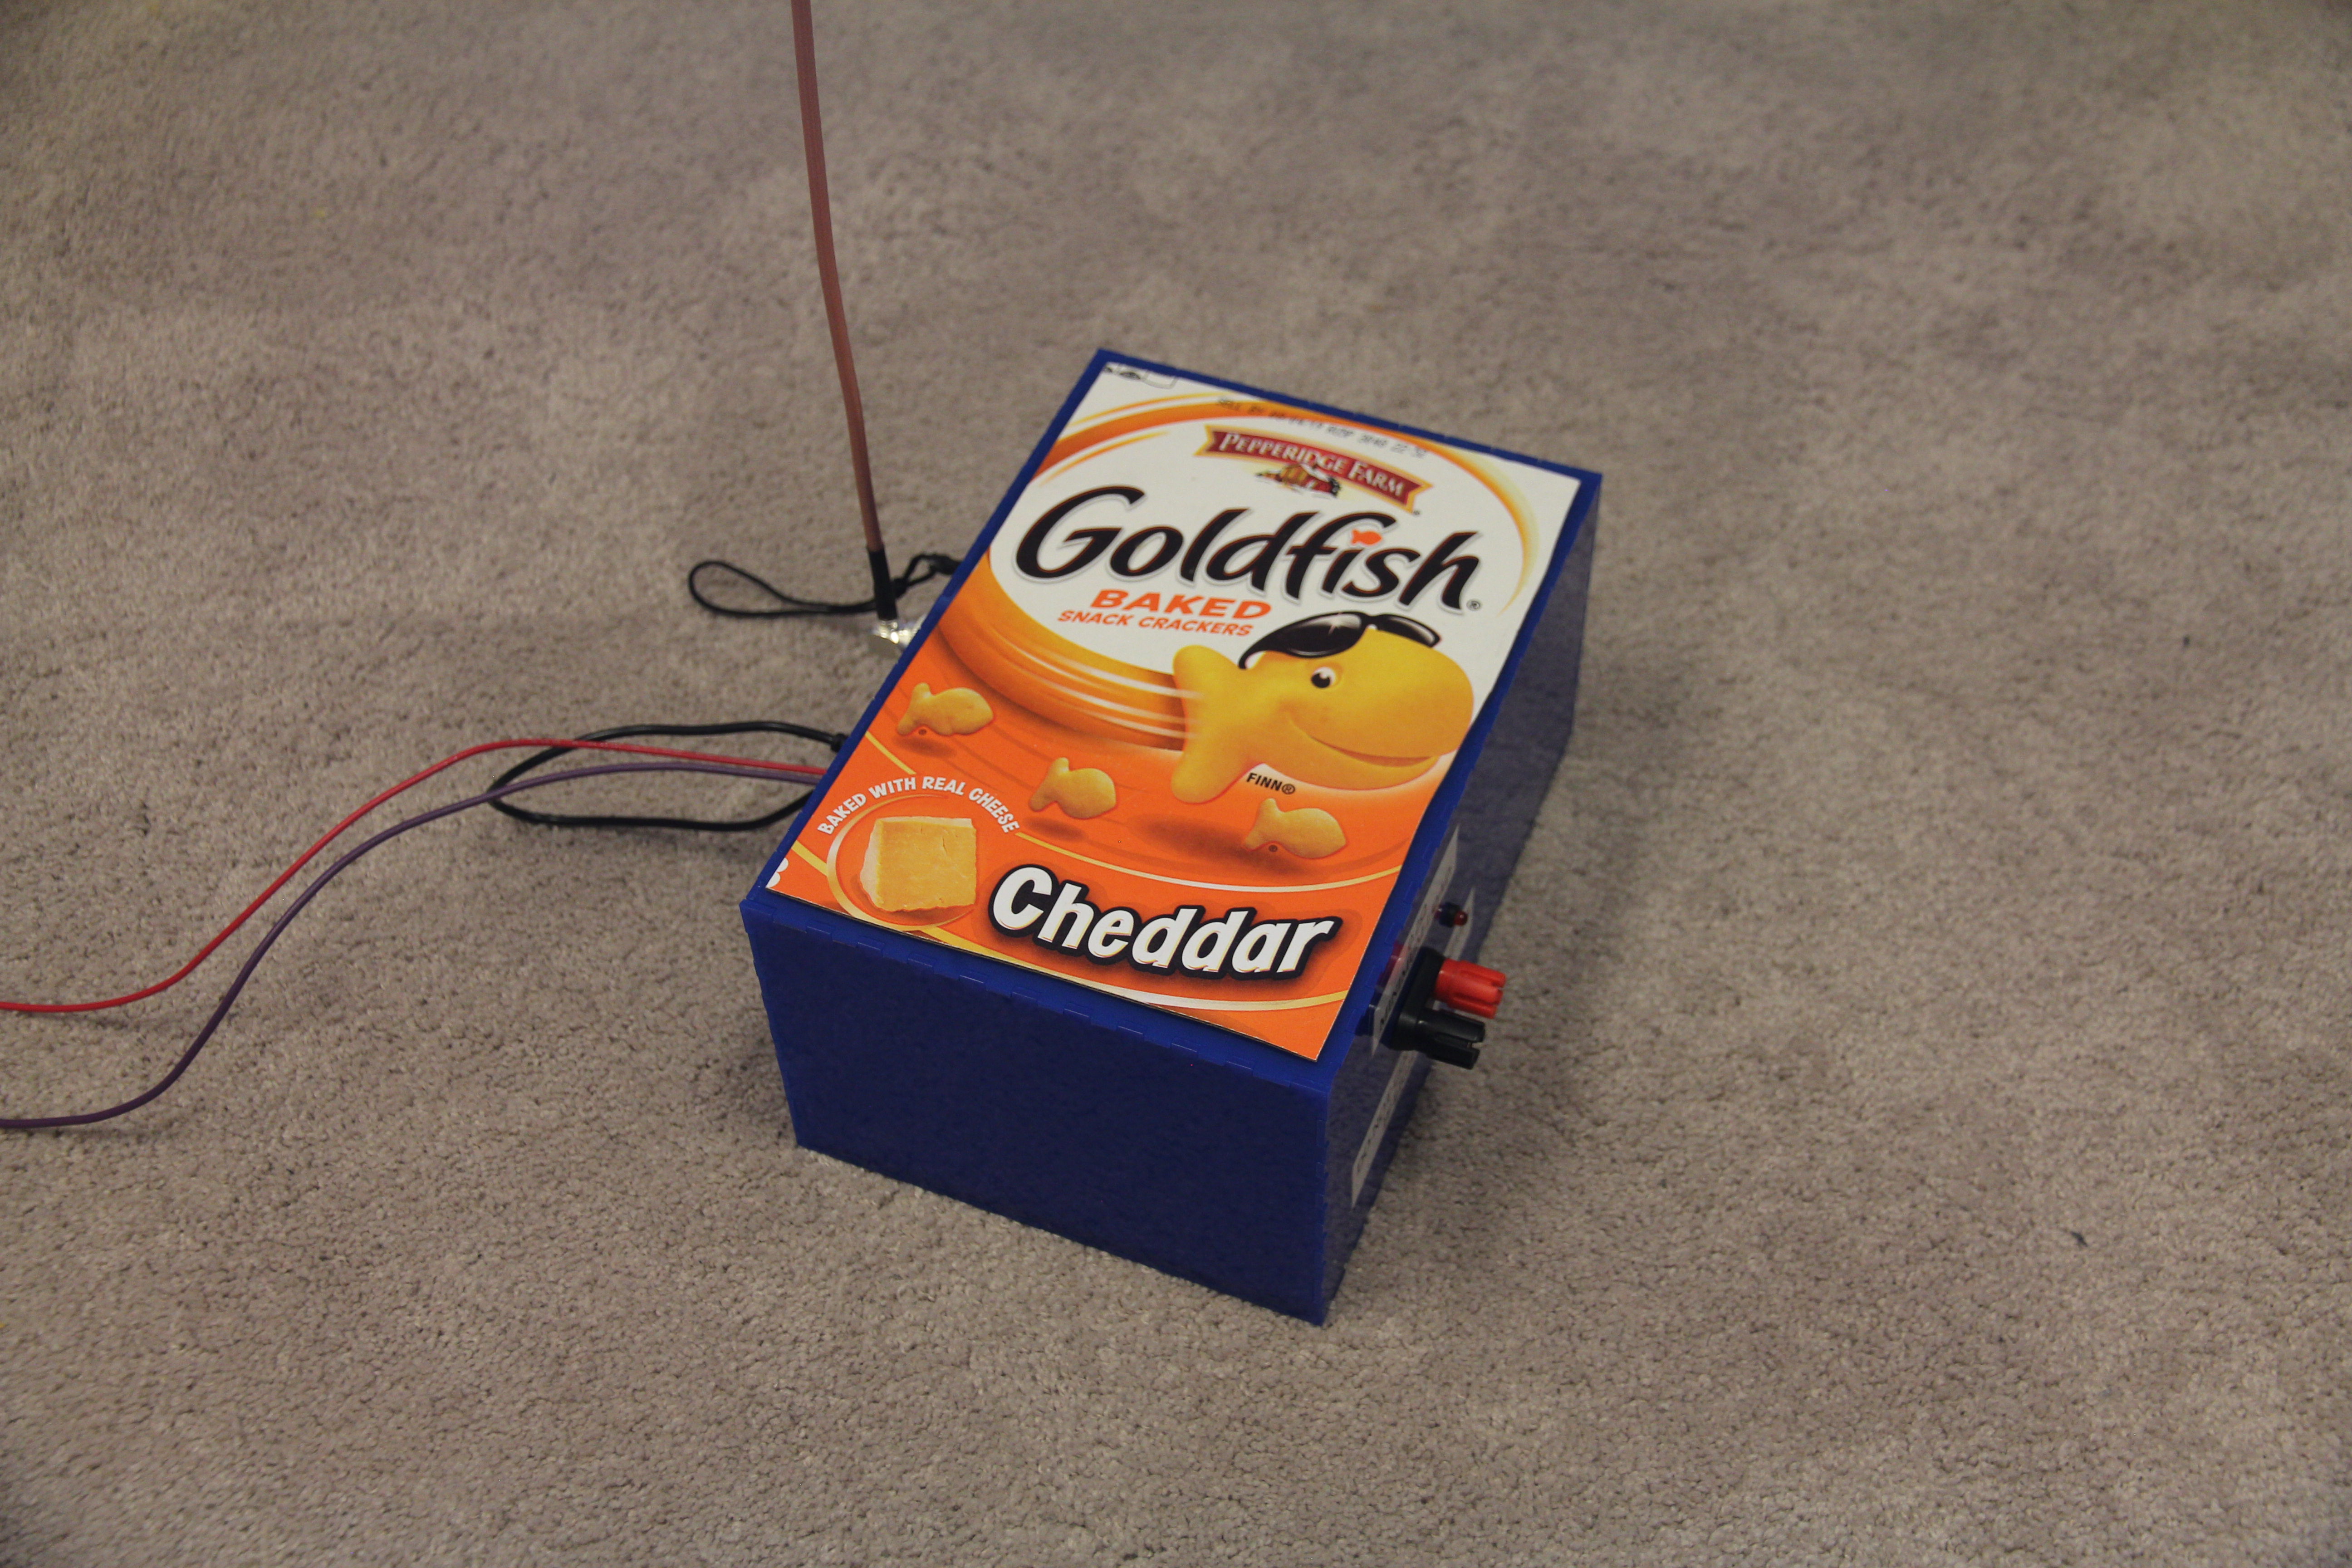
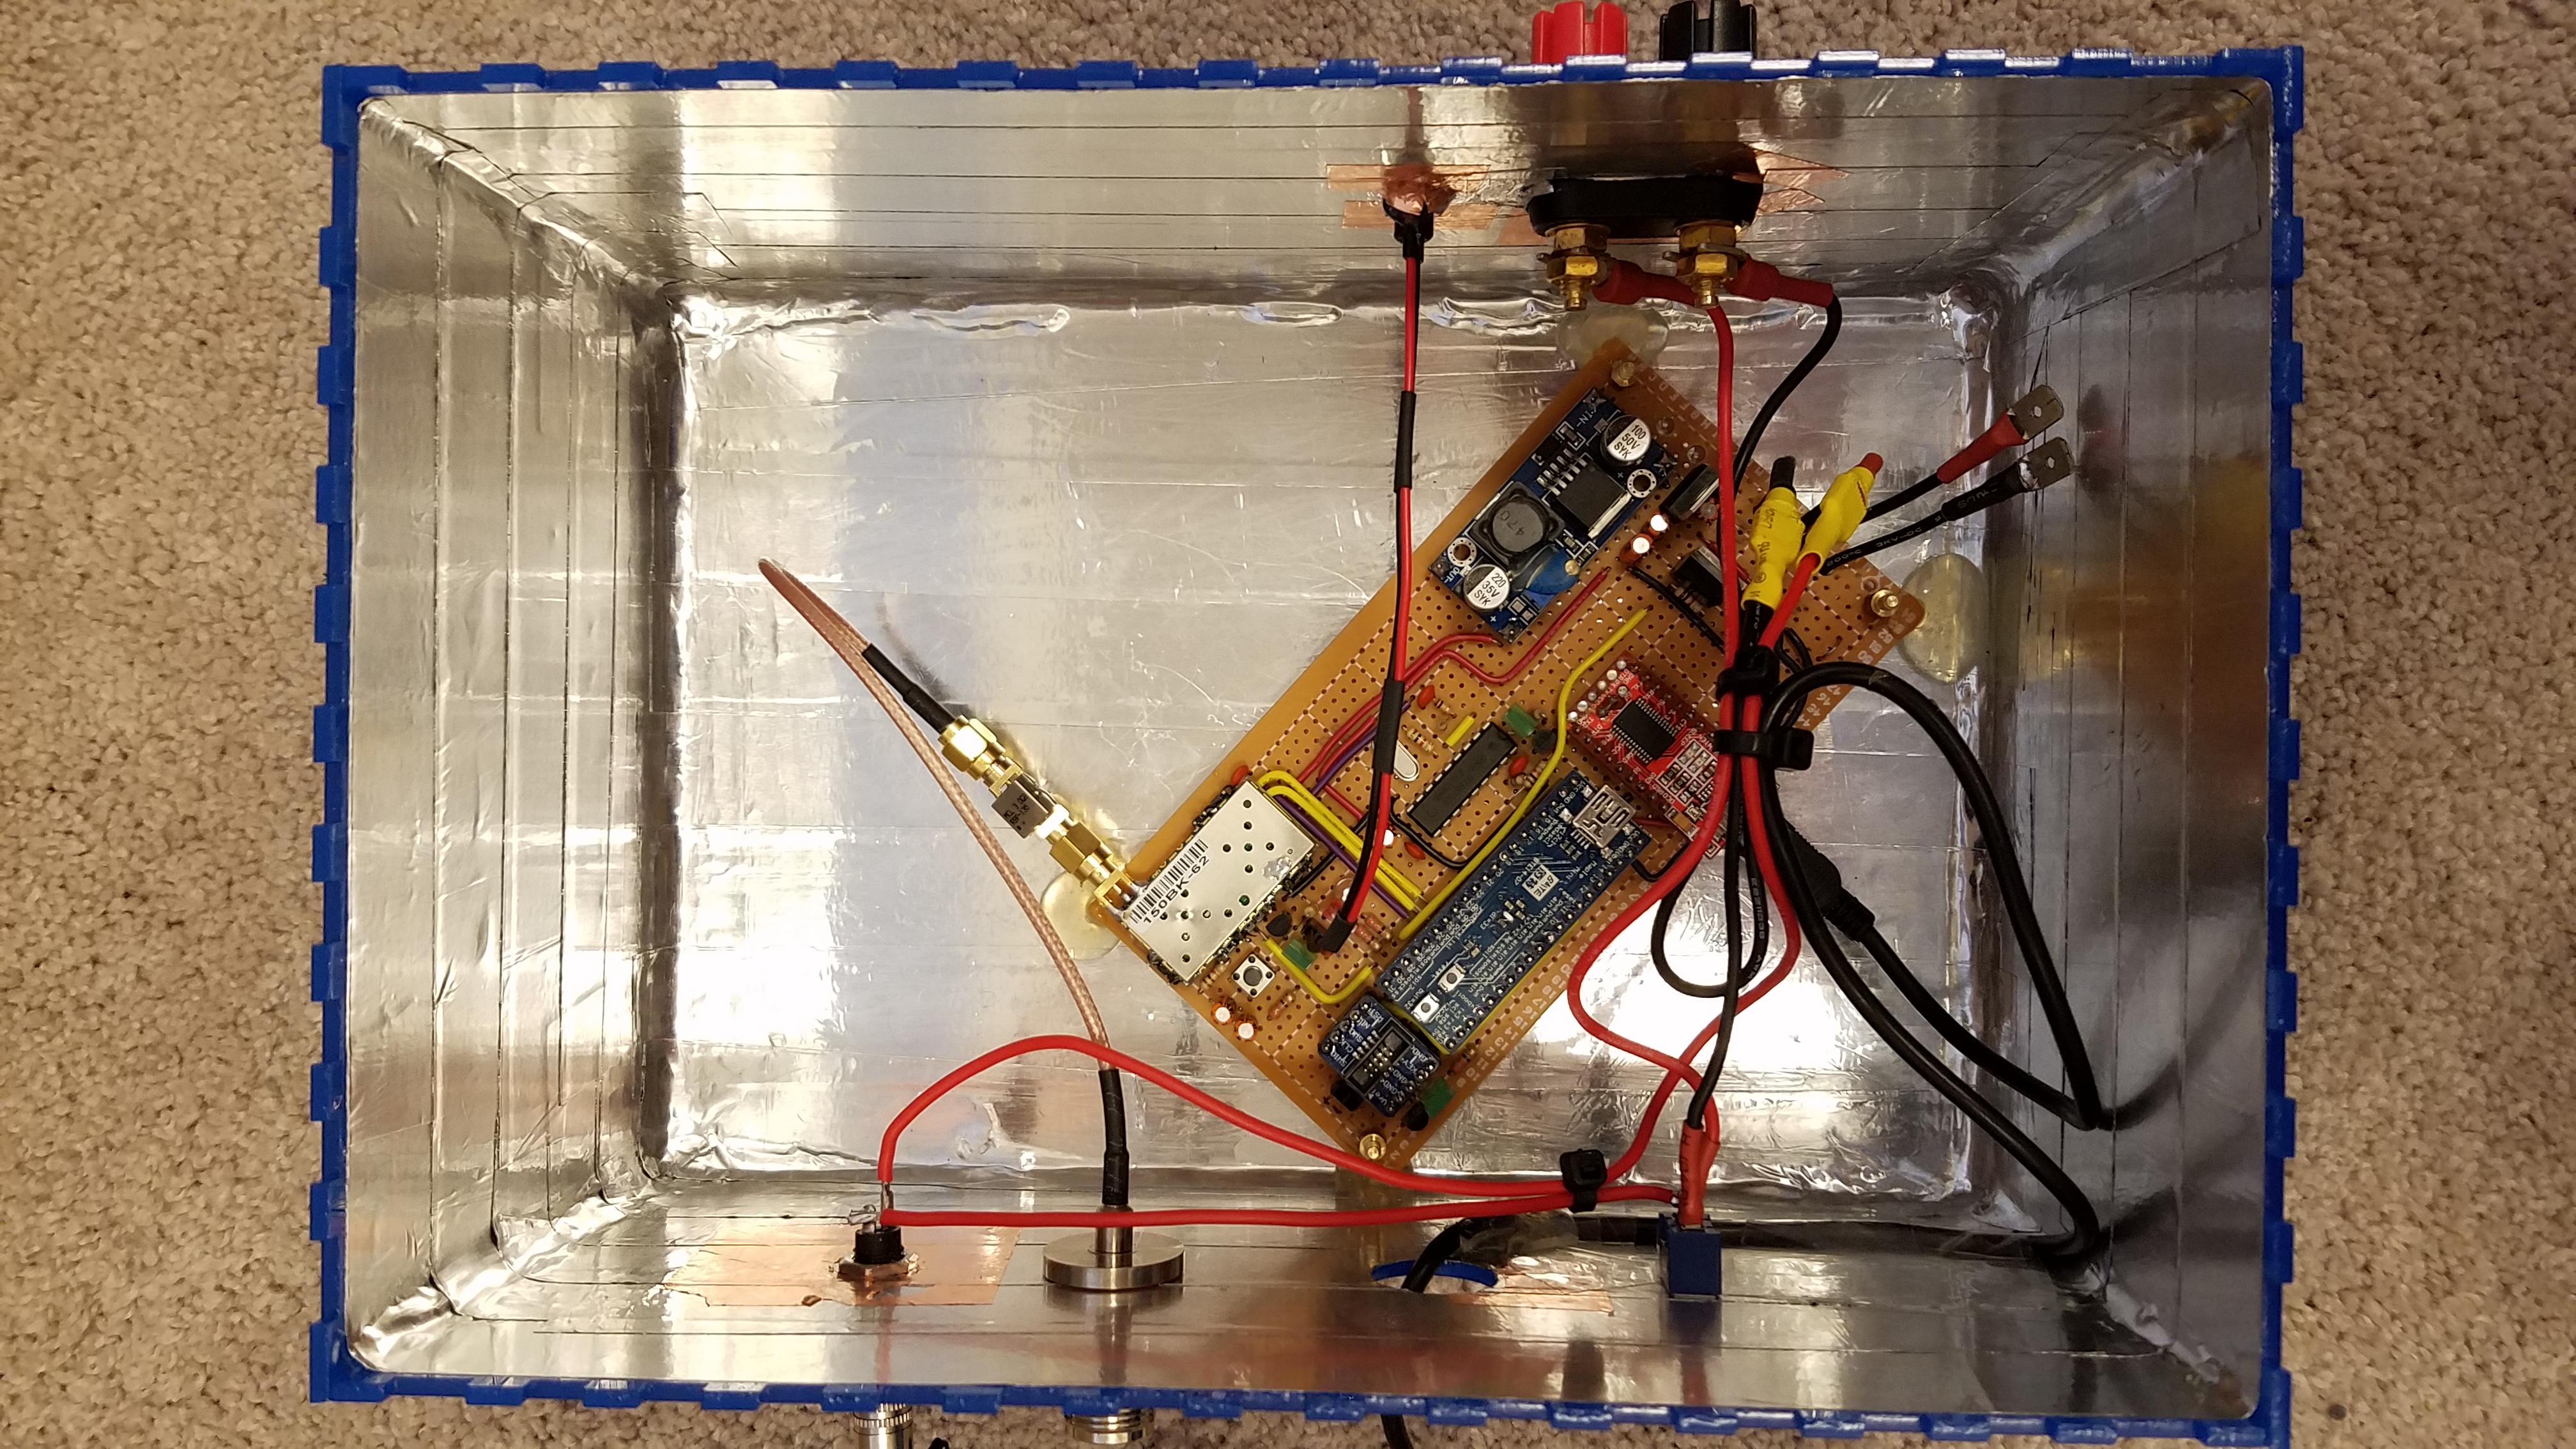
Goldfish 2
Given the flammability of cardboard we switched to a laser-cut acryllic box pretty quickly but the name stuck (and so did the front of the box).
I was also concerned about someone dropping or shaking the box and breaking the electronics so copied it over to a perf-board once I had settled on a circuit.
None of this fixed the underlying issues mentioned above (nor was intended to) so I knew I would be making something better.
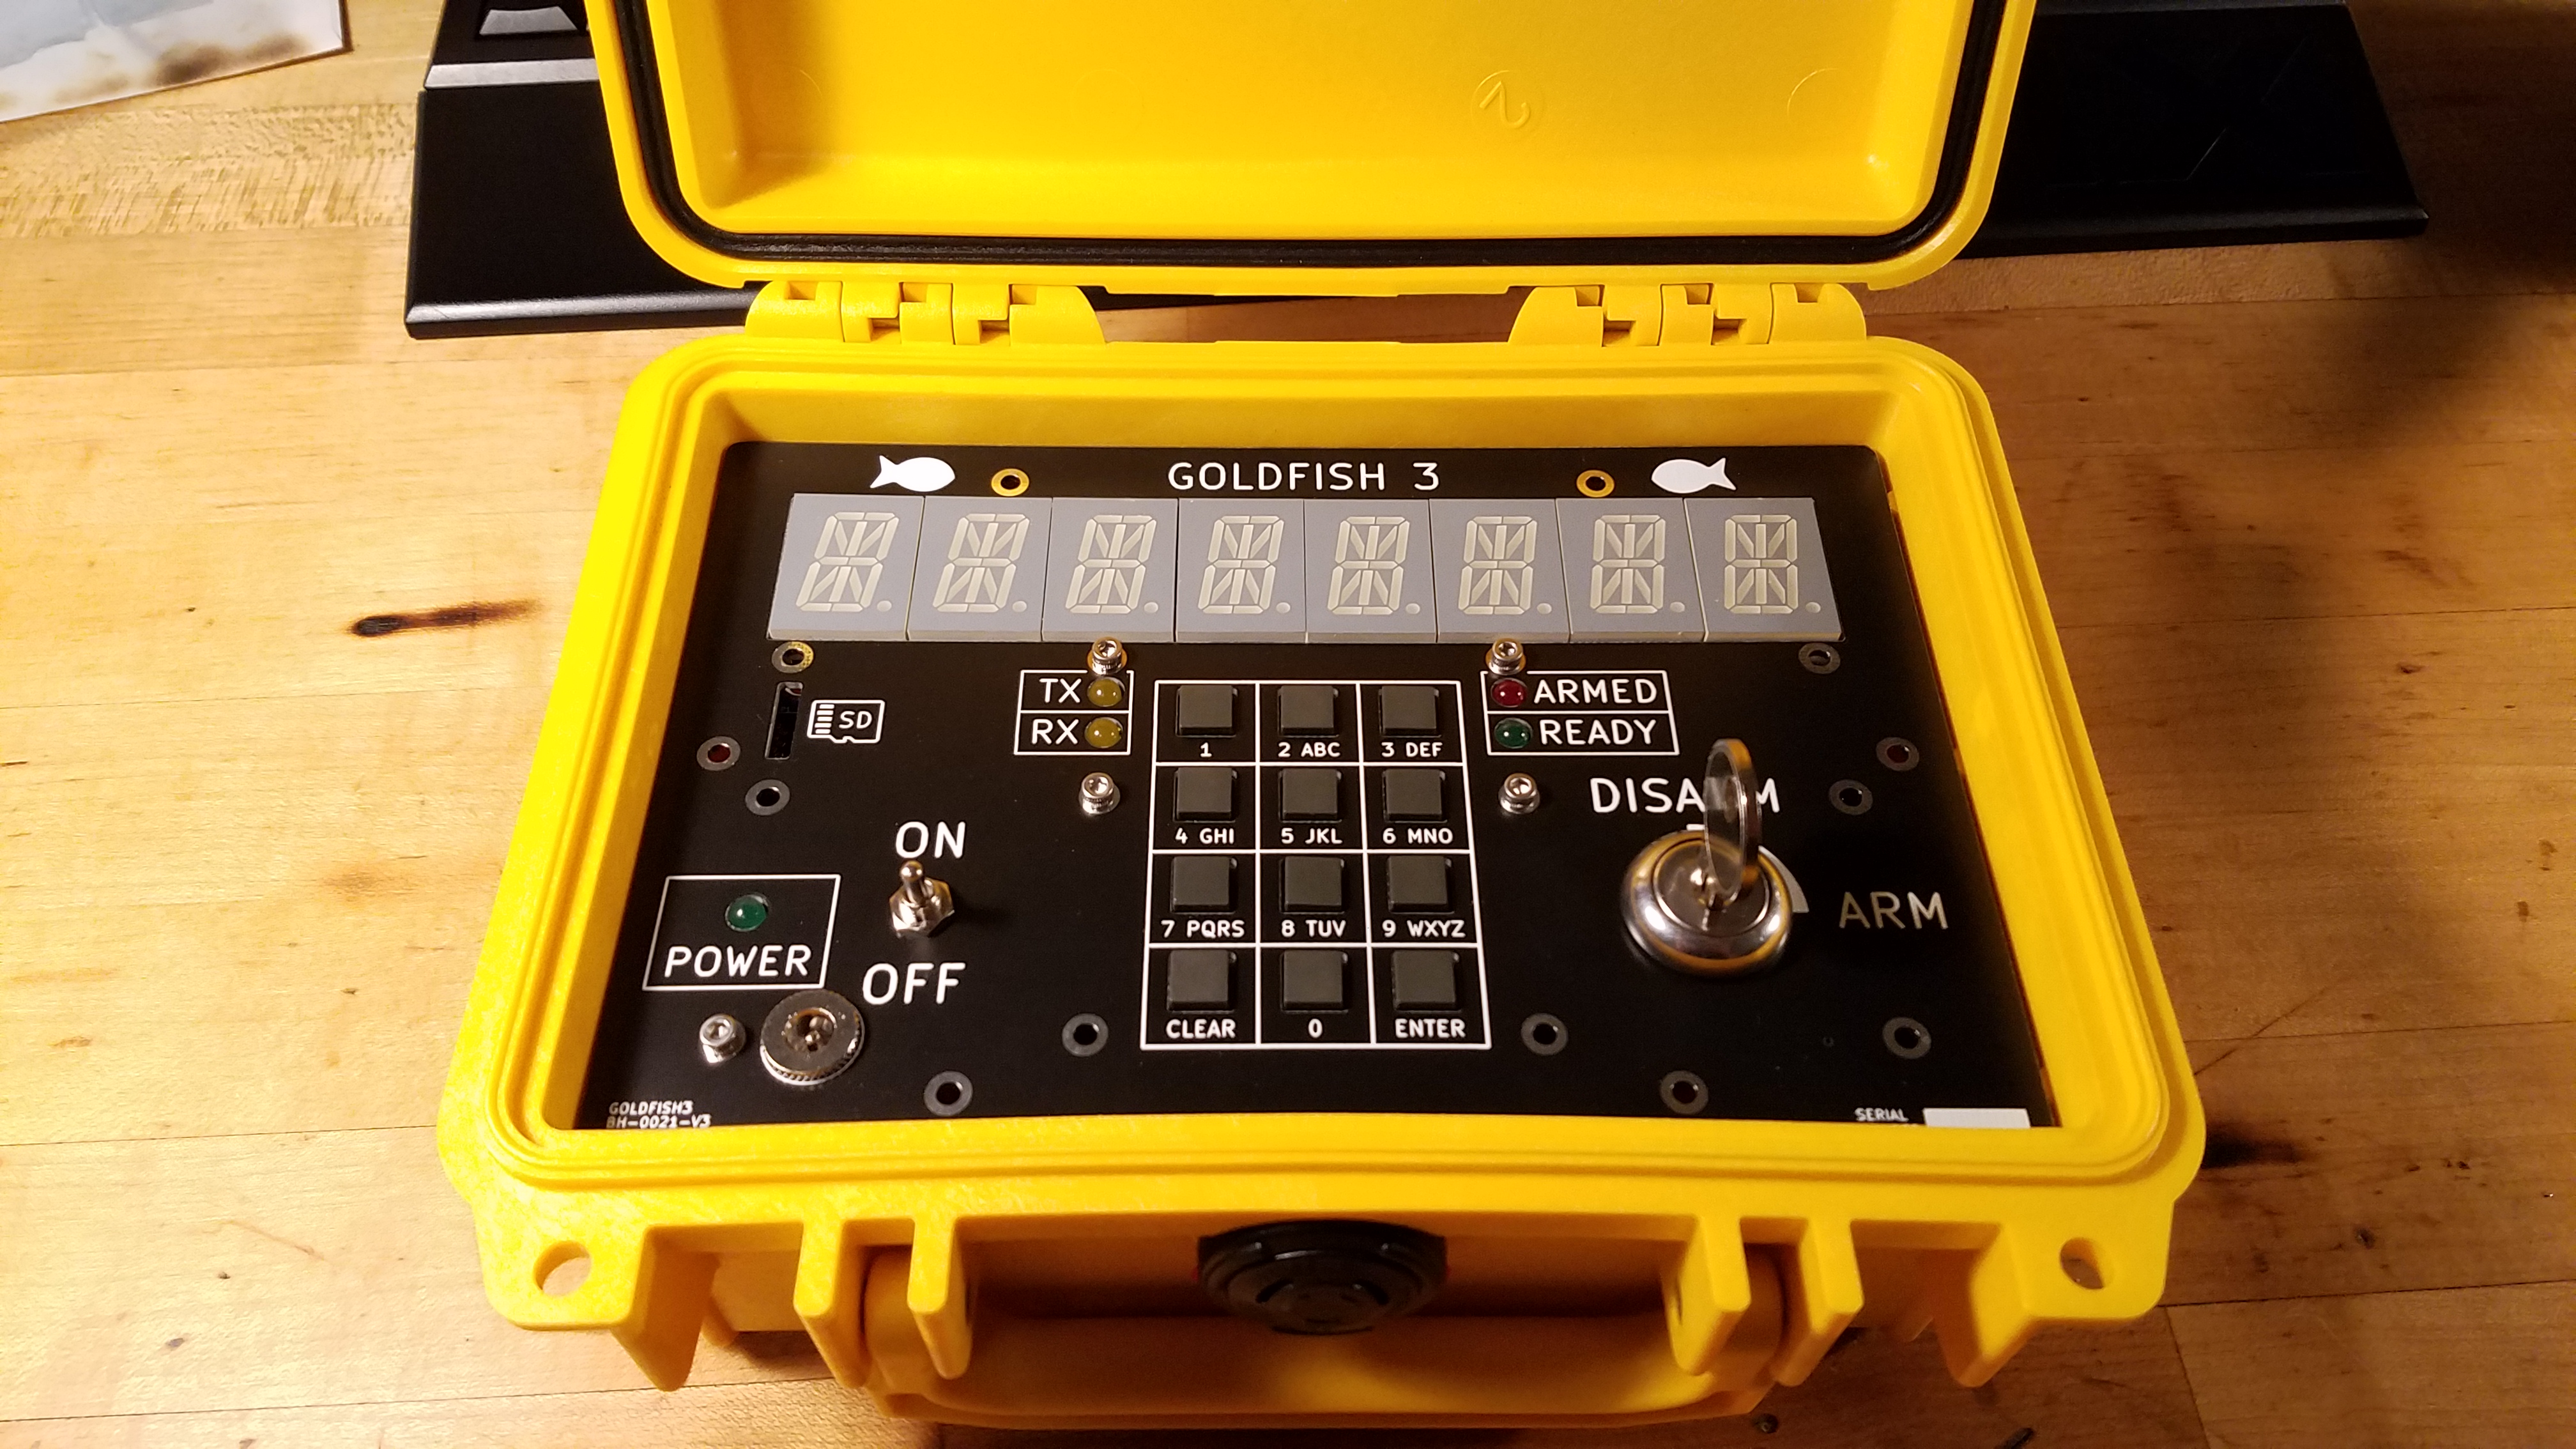
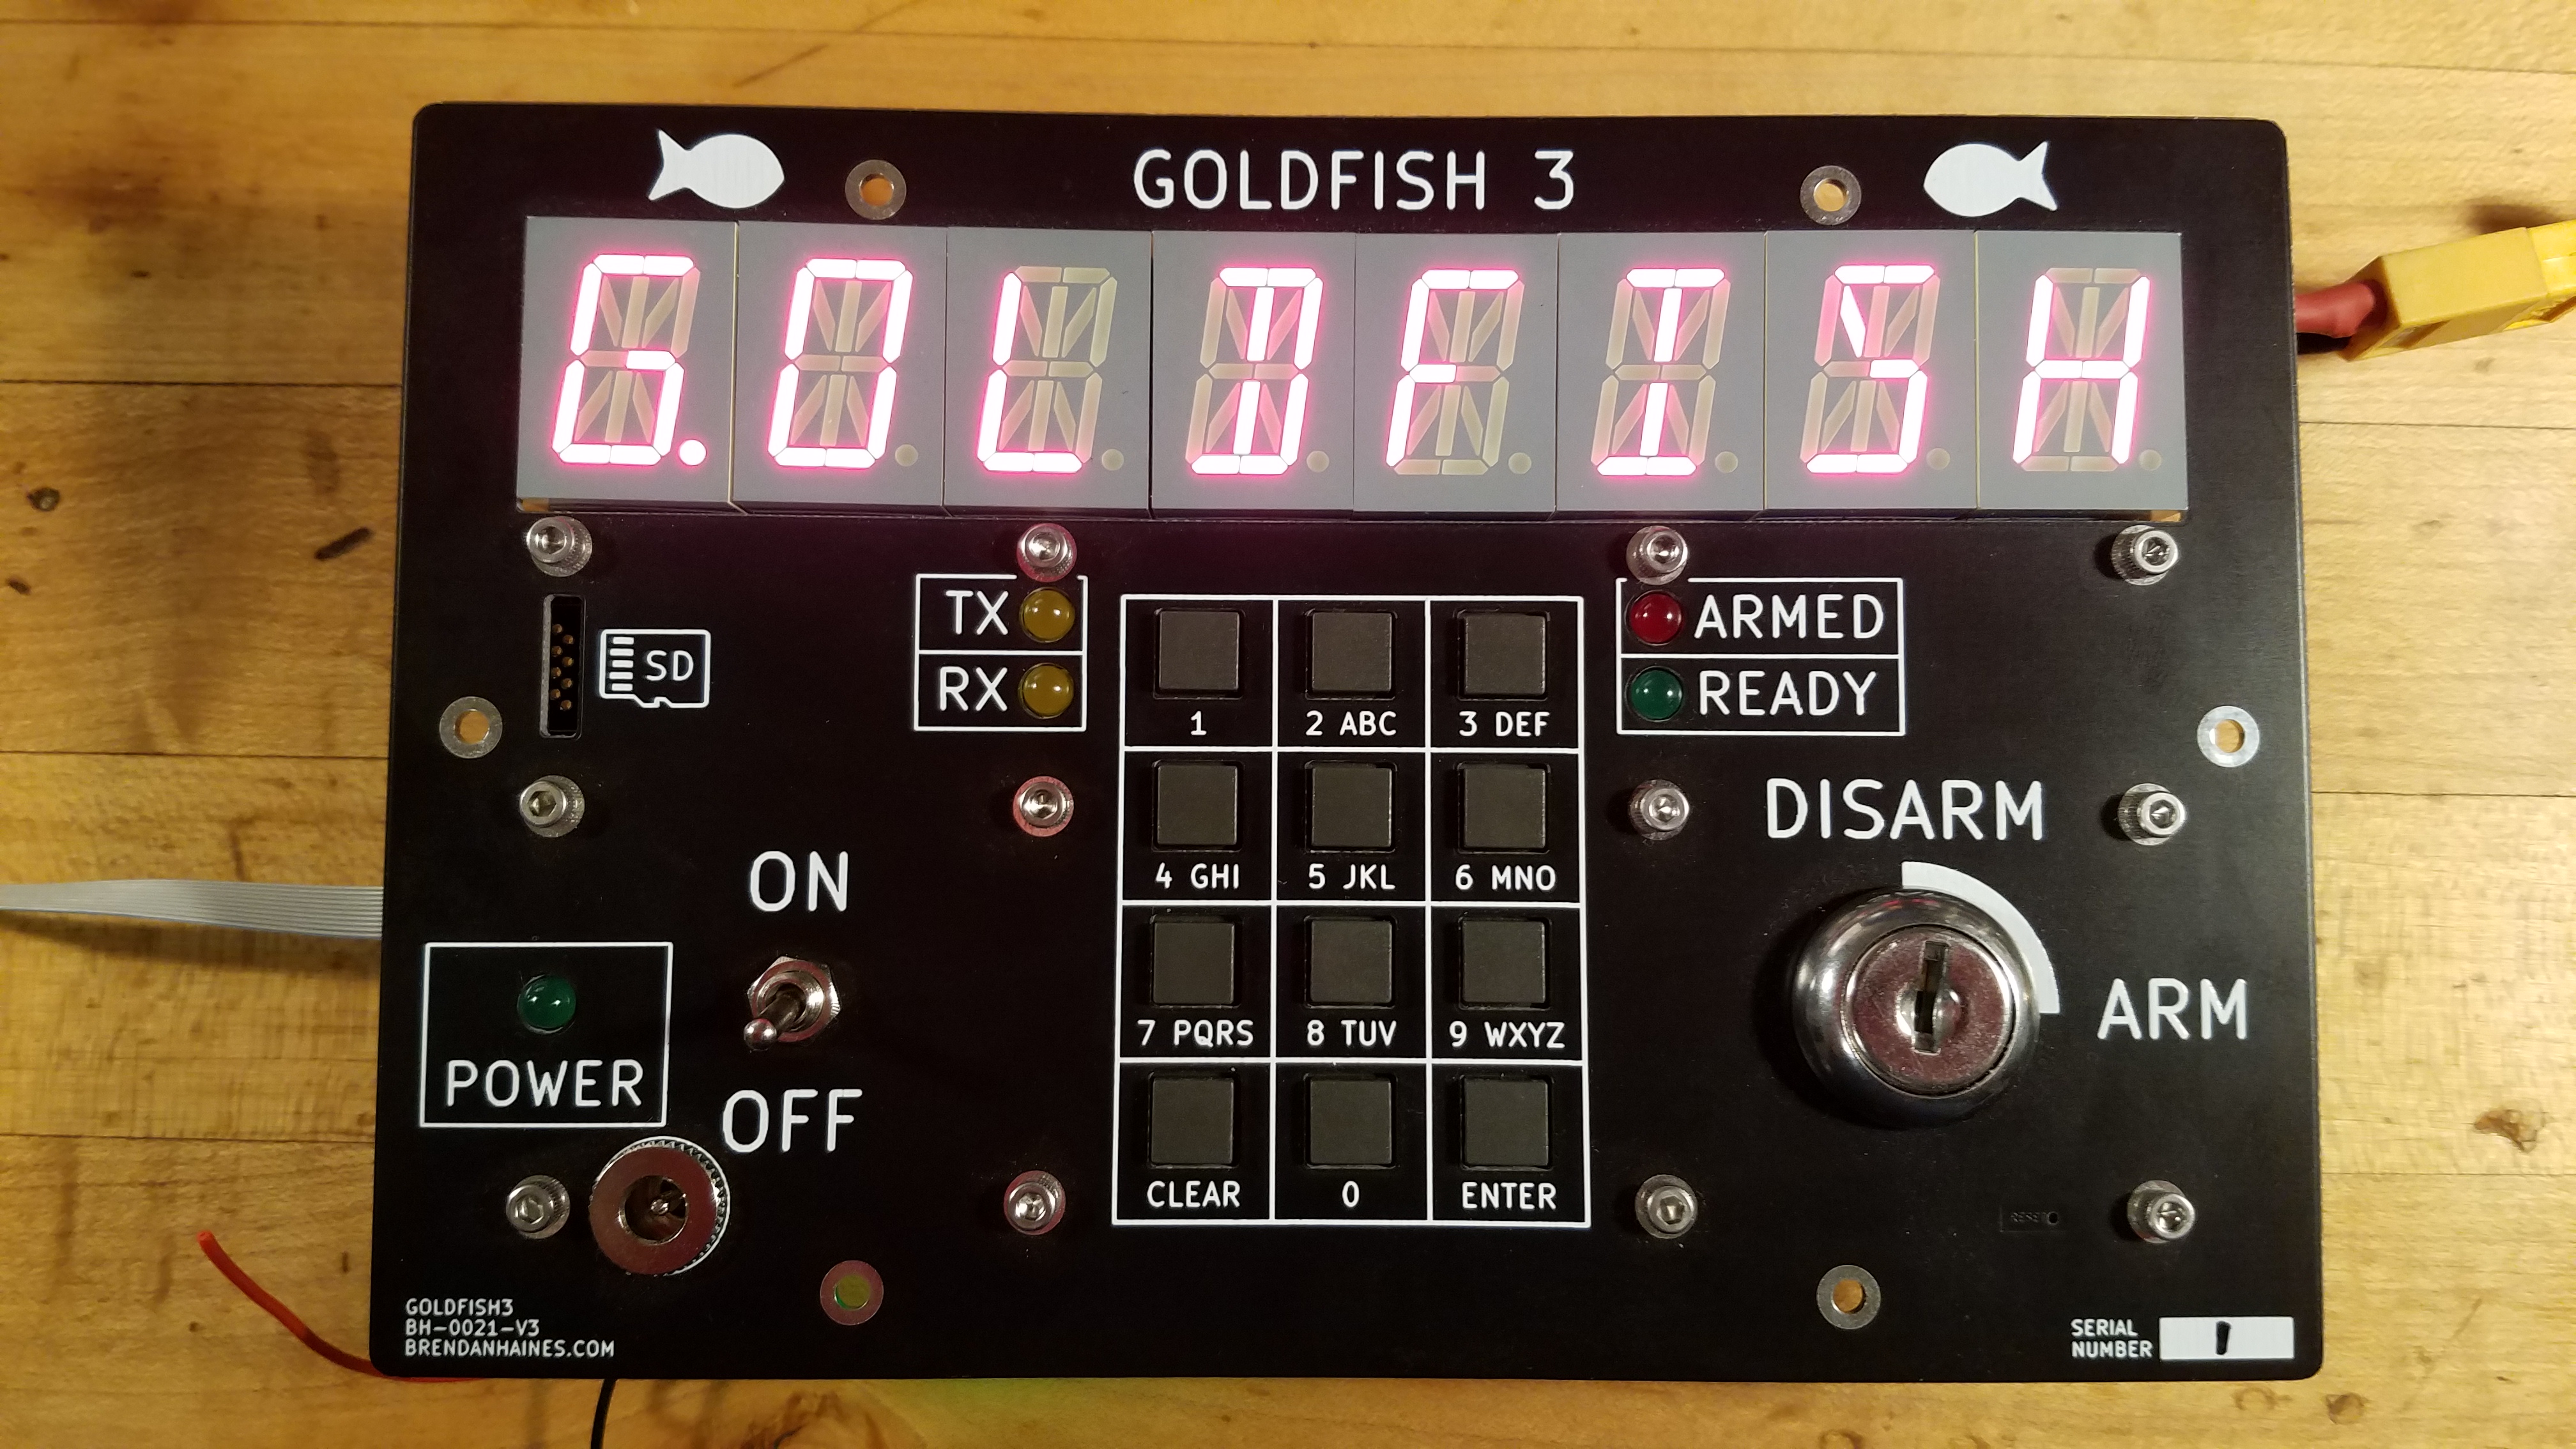
Goldfish 3
Given that I ultimately wanted to make something I would be proud of and could use conveniently, it was time for a major redesign.
To eliminate the issues with power I had three strategies:
- Internal battery to avoid momentary disconnects
- Mechanically isolate output during any power events
- Soft power switch so MCU can ensure things are safe during power events
The first is self explanatory. Unfortunately I messed up my charging circuit (or didn’t finish debugging it, I don’t remember anymore) so had to remove the battery for charging. This wasn’t a big deal since everything was held together with machine screws but still obnoxious.
The second and third are more interesting. I added a key switch for arming which also physically disconnects the output. This, along with the soft power switch, gates power-on so turning on the power switch will never do anything unless the arming switch is disarmed (safe).
As far as usability goes, I completely eliminated the terrible USB configuration and replaced it with a number pad and large LED segment display.
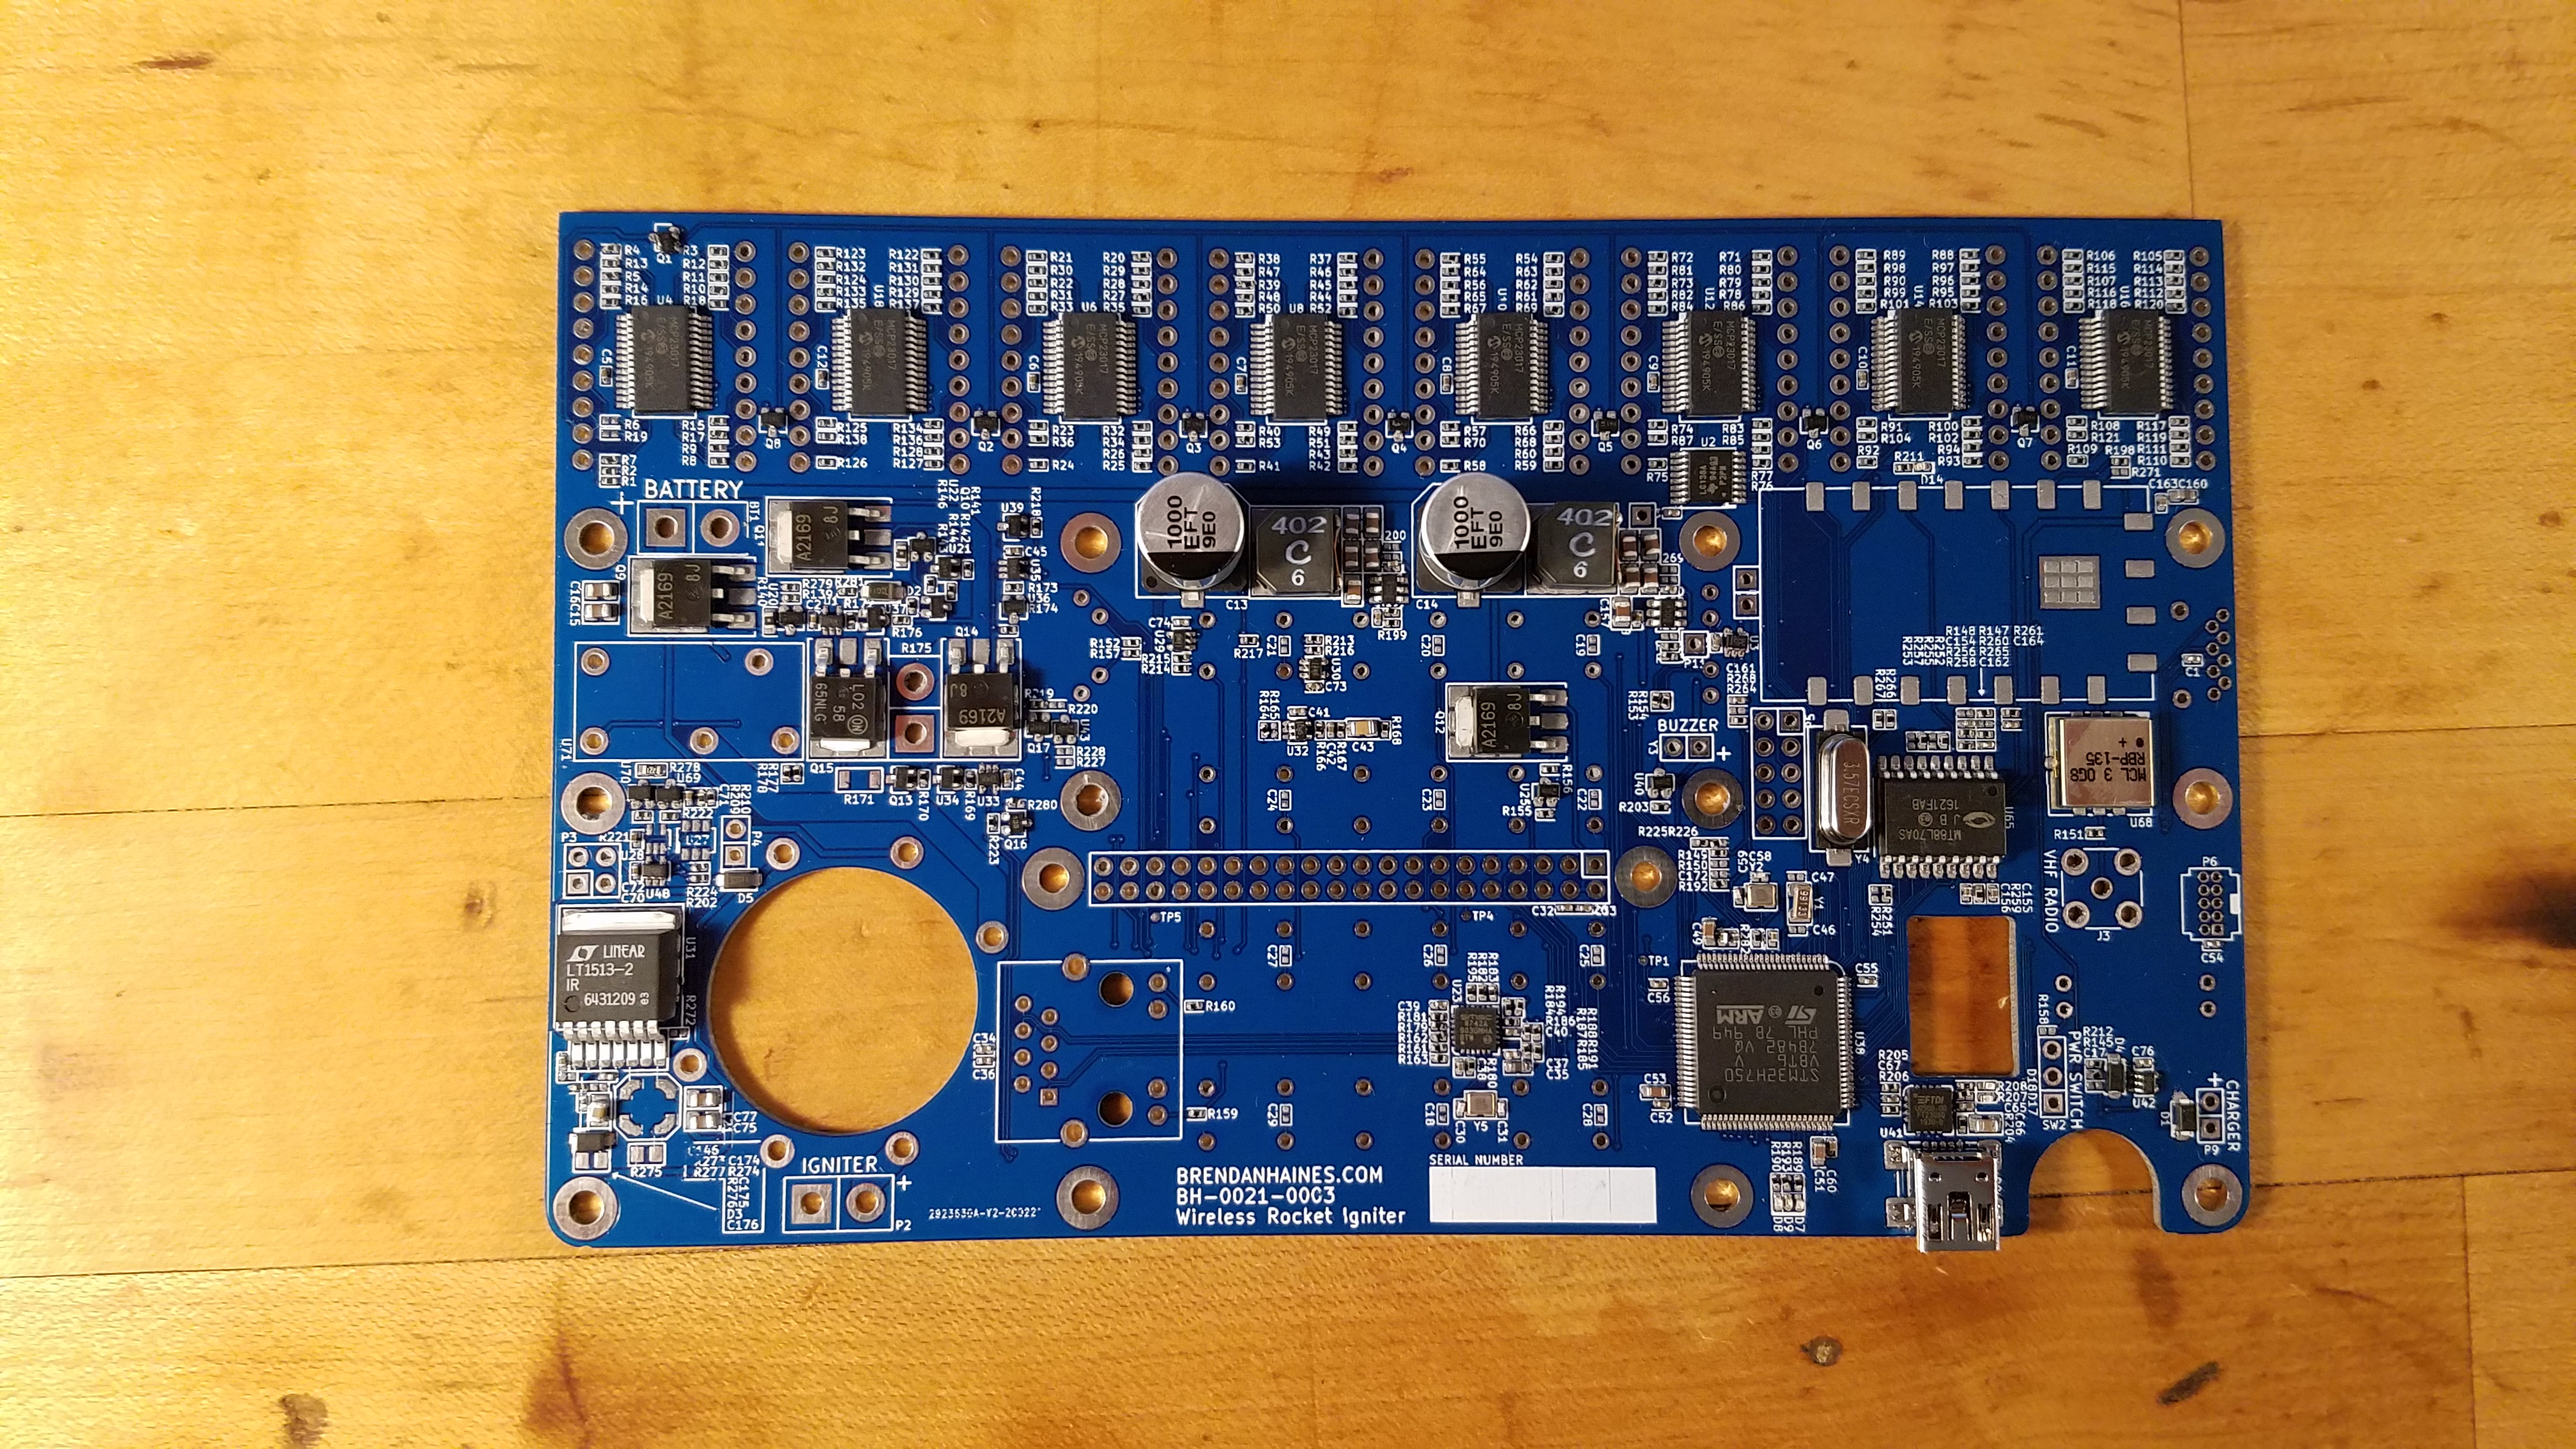
There are some other features on board including a Raspberry Pi for voice synthesis and ethernet to interface with any other sensors at the launchpad. Neither of these were fully implemented since I moved on to other projects before getting around to them.
I wish I could show a video of Goldfish 3 in use but I appear to have lost the few videos I once had.
Resources
- GitLab (This is quite a mess but I’m not going to clean it up at this point)
I haven’t touched this project for about 4 years before writing but there’s no time like the present to document past projects. Unfortunately I didn’t take very many photos and no longer have access to the hardware so please excuse the lack of quality pictures.